Showing posts with label oatmeal. Show all posts

Tuesday, April 16, 2013

Bakery on Main - Part Oatmeal

Product Review time people!
I'm so excited to share with you what I have been eating loving these past few days...
oatmeal !
Yes, I have previously fallen in love with oatmeal, but this is different.

Why you ask?
Well, it's instant oatmeal-which I usually do not appreciate. But this... this I can handle :)

Bakery on Main is the company I am reviewing for and let me tell you about their set-up...
They started as a small bakery in Connecticut and through a series of events, became the great company we know today. They are passionate about creating gluten free foods that taste just as good (in my opinion -better!) than most gluten-containing counterparts. 
They still make in small batches, which comes through in the amazing, homemade flavors.

So now onto the oatmeal! 
YUM.
We could really just leave it at that. It really sums it up-but for the sake of being informative I'll continue :)

Their oatmeal is so thick... usually instant is thin and watery, I actually had to add 1 cup of water (the package says 2/3 cup) 

(the strawberry shortcake, alongside a big ole glass of strawberry milk! ...overkill on strawberry? NEVER!)

I also feel as though you are getting way more bang for your buck with their oatmeal as well. Most instant oatmeal's do not satisfy my hungry stomach... But this definitely did-without weighing me down! 
(I topped the carrot cake flavor with pecans, but it would have still been delicious without!)

The flavors are also incredible! 
They have four flavors out now:
Traditional
Apple Pie
Strawberry Shortcake
and Maple Multigrain
....all amazing people. All amazing!


YUM Blueberry!

...some bananas added for my enjoyment!

I was also lucky enough to get to sample their two newest flavors as well that aren't on the shelves yet-
Blueberry Scone
and Carrot Cake
OH. MY. 
Serious deliciousness up in there. 
The blueberry scone honestly tasted like dessert. And so did the carrot cake! There were even little bits of blueberry and carrot in their respected bowl! 

We all know how much I LOVE that addition of texture and flavor!

We should probably touch on the nutrition facts...
On average-one packet contains around 200 calories, 35g carbs (5g fiber!) and 6g protein.
What do I say to that? Nice.
They also have 10% of your iron needs. Double Nice.
And to top things off-like I mentioned earlier they are gluten-free if you have Celiac disease and require that!
...They also have chia seeds in them! WOOOO for Chia!!! (...so that's why it is so much thicker than Quaker...makes sense now)

...if you want to know the honest truth... right now I'm downing the Apple Pie flavor... so if my grammer is a little off or spelling is less than par, it is because I am far more focused on the deliciousness entering my mouth right now!

Thank you Bakery on Main for such a delicious product that is filling my tummy right now!
~Look for the next Bakery on Main product review coming soon!

*All opinions were completely my own, I was given no compensation for this review.

Thursday, April 11, 2013

Granola Muffins


What's cute and small? Sweet and crunchy? With a little bit of sass? 
Well me when I was 5! (minus the crunch!) But also these Granola Muffins!

They are a perfect little treat that can be customized to fit any taste palate. Not to mention easy to make... so easy you can even get the children you babysit involved for a fun way to pass the time!

First things first - get you dry ingredients all stirred together (this is a perfect job for little hands)

Then... while the little one(s) are doing that, you can melt up the wet-ish side of things...

When it's warm and all thoroughly mixed together, wait about 3-4 minutes after it starts simmering... then you are ready to pour it over the dry!

You'll mix them together really well and press into muffin tins. 

Then place in a 350* oven for 20ish minutes (sides will be golden brown)

And viola! 

Also a perfect on the go treat for you!
I threw these into the car as they were just cool enough to pack up before I went out and picked up the rest of the kids from school. 
It was a perfect in the car snack! This is due to these Granola Muffin's 3 qualities:
1. Healthy (so I can feel good about feeding them to children)
2. Delicious (so the kids actually want to eat them!)
and
3. More on the chewy side of things instead of crunchy ... aka-not a HUGE mess in my backseat!
:)

So here is the full out recipe-
Ingredients:
(wet)
-1 banana
-1/4 cup peanut butter
-1/4 cup honey
-2 TBSP. butter
-1 tsp. salt
(dry)
-1 1/2 cups oats
-1/2 cup flour
-1/2 cup cereal of choice
-1/2 cup coconut (or any nuts/cereal)
-1 tsp. baking powder
-1/4 cup nuts (or any other mix-in... choco chips, raisins, etc.)

1. Mix dry together
2. Heat wet on stove, mashing banana and mixing well.
3. Let wet simmer on stove for 3-4 minutes, then remove and let cool a minute or two
4. Add to dry and mix well
5. Press big spoonfuls into muffin tin (greased)
6. Place in 350* oven for 20 minutes, sides of muffins should be golden
7. Cool, remove and ENJOY!


Tuesday, April 2, 2013

Tropically Coconutty Bars

Need a new granola bar recipe?
Are you kidding?!
Who DOESN'T?!

INGREDIENTS:
  • 1 cup rolled oats
  • 1/4 cup rice crispies 
  • 1/4 cup cereal (can be anything really~as in grape nuts, granola, shredded wheat, etc.)
  • 1/4 cup whole wheat flour
  • 1/2 tsp pure vanilla extract
  • 2 tbsp coconut oil 
  • 1/4 cup coconut
  • 1/4 cup honey
  • 1/4 cup sugar (sugar substitute works fine)
  • 1/4 tsp salt
  • 1/4 tsp baking soda
  • 2 tbsp juice (like apple juice)


  • THE DRILL:
    -Heat oven to 350*, get a 9x13 pan and cover bottom with parchment paper
    -Melt coconut oil, add honey, sugar, salt, soda, vanilla extract and juice... mix well
    -Throw together the dry ingredients; flour, oats, crispies and cereal
    -Heat in microwave again
    -Add the wet and mix well until all the dry is completely covered with gooey amazingness
    -Dump into a 9x13 pan, cover with parchment paper and step, yes step on it to press it down completely
    -Bake in oven about 10 minutes (edges will be golden)
    Oh yum oh yum oh yum

    These are slightly sweet. Coconutty and tropical in delicious ways.

    Yes, coconutty is a word.
    I don't care what the red line under my about to be published blog post says. It is. 

    ~highly adapted from: http://chocolatecoveredkatie.com/2012/05/17/quaker-style-chewy-granola-bars/

    Monday, March 11, 2013

    Grandy Oats

    What time is it?! Product Review time!

    And today's winner is.... 
    ...oh don't act surprised, it was in the title people :P

    Anyways- Grandy Oats was created in 1979 by two friends, and then passed onto another set of friends - Nat and Aaron that now run the company we have today.

    They are a certified organic company that sells many 'oat products' as in-
    granola
    trail mix
    roasted nuts
    hot cereal

    I was grateful to receive some samples of the granola (seen above) 
    They were pretty good, I have to be honest with you - this isn't my absolute favorite granola. But it is very good! Don't get me wrong, I just didn't think the texture was crunchy enough for my likings. 
    The Honey Apple Crisp was my favorite about of the bunch!

    But now onto the Hot Cereal... 
    WOAH!

    Loved it. 

    All you do is add 6-7 ounces of hot water and put the lid back on and let it sit for a couple minutes. 
    I was very skeptical about it thickening, but it did! And it was divine
    I loved how the only real sweetener was the natural sweetness from the dried fruits (there was a little sweetener on the dried fruits, but very minimal) 

    Is this any indication of how much I liked it?!

    All their products are made with real, wholesome ingredients and therefore have some great nutritional stats! 
    If you're looking for a new granola company to try out - definitely give Grandy Oats a try - especially if you don't like the more crispy/crunchy granola and prefer a more chewy texture. 
    Also-the little cups of granola are perfect for 'on the go' breakfast - how easy would it be to throw a couple in your suitcase next time you'll be traveling a few days? 

    *All opinions are solely my own, I was not compensated in any way - the only thing I received from Grandy Oats was the samples.

    Monday, February 11, 2013

    Peanut Butter Cookie Granola

    Peanut Butter + Granola = :)
    Dare I say more?

    This recipe requires no commentary, no extra words tell you how amazing it is and persuading your to make it-I mean, you'd be crazy to see a recipe containing the words peanut butter and granola and not deciding to make it within 35.39 seconds 
    Just Crazy.

    So here's the low-down...

    melt peanut butter and margarine

    til margarine is completely liquified - then add honey and egg white

    combine it with a bunch of other random stuff.. 

    throw it on a pan and stash in your 250* oven for 45 minutes or so

    and magically it will turn into this!

    Ingredients:
    1.5 TBSP margarine
    1/2 cup peanut butter
    2 TBSP honey
    1 tsp. vanilla extract
    1 egg white
    1 tsp. baking powder
    1 pinch salt
    1 cup oats
    1/2 cup fiber one cereal
    1 1/2 cup crispy brown rice cereal
    1 TBSP. chia seeds (opt.)
    2 TBSP. flax seeds (opt.)

    Preheat oven to 250*
    Melt your peanut butter and margarine, then add all ingredients up to salt.
    Mix well
    Combine dry ingredients together
    Pour wet-melted stuff over the dry and stir to coat all
    Place on a cookie sheet and bake-stirring every 10 minutes for 40 minutes to an hour; until pieces are 'dry' but not overly brown


    Swirled into a peanut butter smoothie? 
    Heaven on Earth.


    Tuesday, January 22, 2013

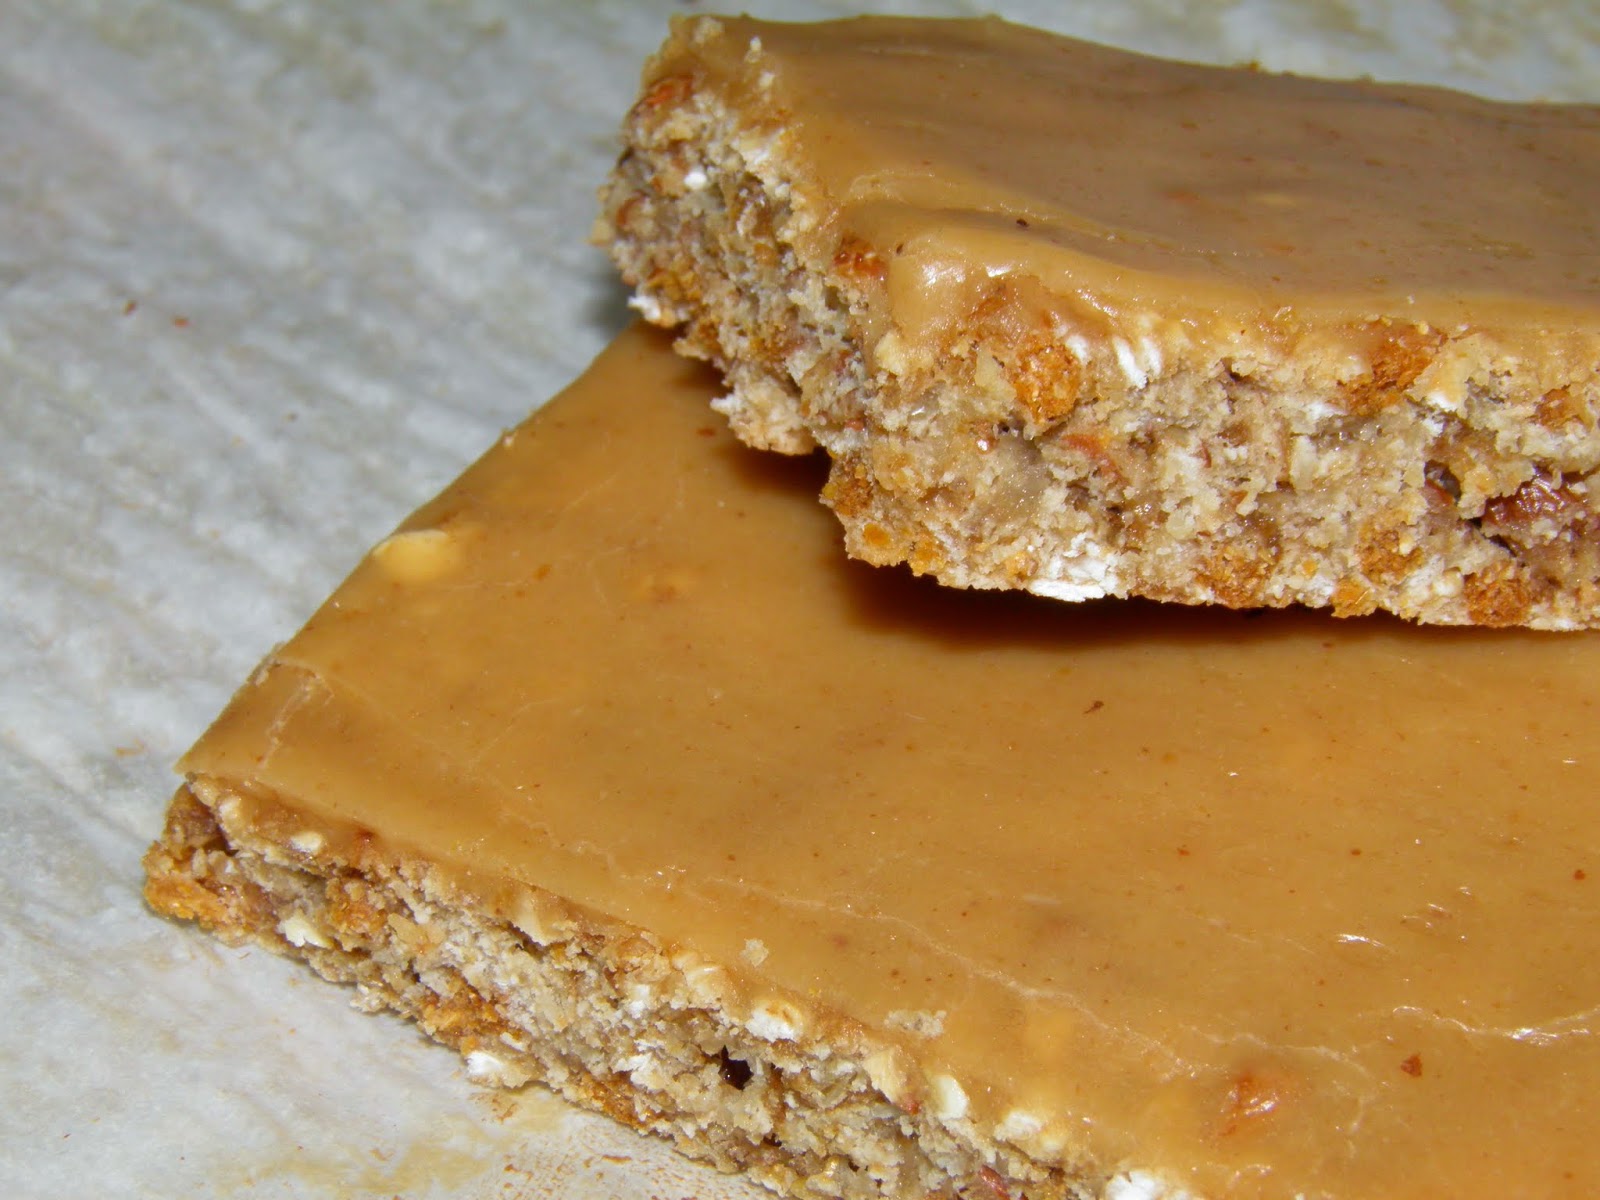
    Frosted Peanut Butter Bars

    Would you just look at that peanut butter ooey-gooey frosting dripping off that chewy snack bar?

    Now think about how healthy it is! I'm not joking... healthy peanut butter frosting. Yes, I did it! *bow*


    Ingredients: 
    1 egg
    1/2 cup applesauce
    1 small banana (mashed)
    1/3 cup honey
    1 tsp. baking powder
    1/4 tsp. salt
    1/4 cup flour (any kind-I used coconut and it worked!)
    1 cup puffed wheat cereal
    1 cup oats
    1 cup rice crispies
    1/2 cup bran flakes (or any other cereal)
    1/2 cup fiber one (or any other cereal)

    yum yum with bananas!

    All you do is blend the egg, banana, applesauce, honey until nice and smooth
    Then mix in baking powder, salt, flour
    Finally add in all the cereals
    Bake on 350* for 10-12 minutes - not long, just enough to make it set


    Now for the frosting!
    Just mix equal parts peanut butter and milk and warm in microwave. (start with 1 tbsp.)
    Add a splash of vanilla
    Then mix in powdered sugar (you can do it sugar free!)*
    And mix until it is smooth
    Spread over warm, but not straight out of oven bars

    *Blend sugar substitute in a high powered blender until it becomes sugar-free powdered 'sugar'
    Awesome. 

    Have a happy day! :)

    Monday, December 31, 2012

    Multigrain Bread

    With today being New Years Eve, a lot of people are thinking about their New Year's Resolution... I'm here to help! How you ask....
    Maybe your resolution is to save money by making more of the food you consume at home...
    Maybe your resolution is to eat healthier...
    Maybe your resolution is to reward yourself and eat more delicious, soft, moist, hearty bread! (oh-that's just me? Oh well...)

    Even if your resolution did not fall into any of these three categories, I can assure you that you will still enjoy this bread recipe!


    1 1/4 cup white flour
    1 1/4 cup whole wheat flour
    1 cup white whole wheat flour
    1 cup old fashioned oats
    1/4 cup sunflower seeds
    2 tablespoons flax seed
    2 TBSP. wheat germ
    1 1/2 teaspoons active dry yeast
    1 teaspoons salt
    12 ounces barely warm water
    4 tsp. vital wheat gluten

    Directions:

    1. Proof yeast - add 1 pkg. (2 1/4 tsp.) fast acting (aka quick rise) yeast to 1/2 cup warm water. Let sit a few minutes - if bubbles form, your yeast is good to go!

    2. While waiting for yeast to 'proof itself' (hehe- punny joke!) you can get started mixing the dry ingredients together. This includes... well everything but the water. Just throw in all together in a bowl or stand mixer and combine!


    3. Add another cup of warm water to your water/yeast mixture


    4. Slowly pour water/yeast mixture into dry ingredients and begin mixing

    5. As your water becomes fully incorporated you will begin kneading the dough - note: you may need to add a touch more flour or water to get it to the right consistency. This dough should be elastic, not very sticky and slightly heavy

    6. Knead for about 6-8 minutes (or 4-6 if using the kneading attachment on a stand mixer)

    7. Place in a bowl and cover with a dry kitchen towel. Place in a warmish area and let rise until double - about 1-2 hours.

    8. After it has doubled - punch dough down and allow it to rest another 10 minutes

    9. Remove from bowl and shape into your loaf. Place in a greased & floured loaf pan and cover again with a dry kitchen towel and allow to rise for another hour.


    10. Preheat your oven to 350* F


    11. After dough has risen, place in over and bake for 45 minutes (bread should be slightly browned)

    12. Cool for at least 30 minutes before cutting - this will help create a nicer texture that won't crumble as you slice it


    Friday, December 21, 2012

    California Suncakes

    Guys - I just ate a hockey puck!
    Ok, random story... I've been to one hockey game in my life. During that game my mother managed to get hit in the head by a hockey puck! Yes, one of the hockey pucks came out of the ice box during the game and whacked her right in the noggin. Talk about a memorable game!

    Anyways, back to my eating of a hockey puck. Alright, so needless to say it wasn't really a hockey puck-but it sure looked like one! It is shaped exactly the same, only this 'puck' is sweet, delicious, and nutritious!

    It is actually a Suncake. A huh?! A Suncake.
    I'll explain...

    California suncakes are a Gluten Free energy bar. Made out of whole grain oats, dried fruits, fruit juices, soy and brown rice flour and syrup that supply around 30-40% of your daily needs for protein and fiber - and taste like a COOKIE!
    The company has also expanded now to create 'Heart Thrives' - these little guys are two cakes in the shape of hearts and also contain a good deal of your daily Calcium requirements. They come in 7 flavors: Apricot, Cranberry, Apple, Date, Lemon Poppy Seed (my favorite!), Chocolate Chip and Raisin Spice
    The original Suncakes come in 6 flavors; Apricot, Cranberry (soooo yummy!), Apple, Date, Lemon Poppy Seed, and Chocolate Orange. Each Suncake is a 4 ounce "hockey puck" that is actually two servings.

    These little guys are sweet, chewy and full of flavor! They're obviously extremely portable so they make for a great grab-and-go snack! 


    * A word of warning: since these goodies are made out of whole, natural ingredients and no preservatives, you should keep them in the freezer if you won't be eating them all in a week or two, but honestly-good luck keeping your mits of these delicious treats! 

    Thanks California Suncakes for a chance to review your great tasting product! (all opinions were completely my own, the only thing I ever received for California Suncakes was their sample)


    Monday, November 12, 2012

    Peanut Butter Honey Bars


    If you can't tell, I'm a little extremely obsessed with granola and its various forms... Granola bars, granola chunks, alright-I though I could come up with a lot more forms of granol when I first started writing... but uh-I've got nothing. 
    However, that does not diminish that amount of love I have for granola bars and just plan ole granola people! I LOVE it! ...does the bolding of the word love make it more convincing? 
    Right beside granola in my heart, is (as we all know) peanut butter! Well...actually ice cream may be right in between them-but they're pretty close in proximity! 

    New flavors and combinations that I can throw in a granola bar are constantly going through my brain.... it's a curse really-I should probably maybe definitely be using my time so oh...I don't know... study for my next Chemistry 109 exam... but what fun is that?!

    The newest edition to the granola bar family in my cookbook is Peanut Butter + Honey. Not a new combo by any means-but certainly a delicious classic!

    These bars are sweet and crunchy with just a small hint of salt from the peanut butter that leaves you craving more...

    Ingredients
    3/4 cup rice krispies
    3/4 cup puffed rice (if you don't have this, feel free to use more oats or cereal)
    1 cup dry oats
    2 tablespoons flaxseed meal
    2 TBSP. nuts (any kind-I used cashews but whatever you want!)
    2 TBSP. flour
    2 TBSP. soy nuts
    1/3 cup honey
    1/2 cup peanut butter
    1 teaspoon vanilla extract


    Directions
    1. Mix together all dry ingredients & grease a small cake pan (say 8x10 or something around there-doesn't really matter, however thick you want them)
    2. Heat honey and peanut butter on the stove (or in microwave if you must... :)
    3. Bring to a very low boil and immediately remove from heat 
    4. Stir in vanilla extract 
    5. Add heated honey/peanut butter mixture to dry ingredients and mix well
    6. Place a piece of wax paper/parchment paper over the granola bars in your pan and press down very hard! *


    7. Place in frig for a few hours
    8. Cut into desired sizes - I made 12 good sized bars
    9. Wrap in plastic wrap, or just eat! 

    ~Bars will stay good for about a week - or you can keep them in the freezer and take out when ready to enjoy. (they will thaw in about 1/2 hour)

    *To really make these bars stick together I highly highly recommend jumping stepping on top of your pan to really press the mixture together - you could also get a small child to help you out with this! 

    Time to make more!


    p.s. - go check out this product review of Beanitos chips and sign up for the giveaway! Who doesn't love free chips?!

    Thursday, July 26, 2012

    Chewy Oat Bars


    I recently received some Newman's Own Organic product to sample and review. One product I absolutely loved was their dried fruit! - Newman's Own Organic Dried Fruit I decided I would use this amazing product to make a new recipe! Chewy Oat Bars


    If you've ever had an 'Oatmeal to Go Bar' from Quaker, you will be extremely pleased with these chewy bars! They taste very similar, but without all the nasty preservatives and other fillers that Quaker decided would be fun to through into my breakfast bar! While they aren't an exact match (but have no fear..I'm still working and will be until I get a perfect match because I am in LOVE with those Oatmeal to Go Bars... :( but my bank account isn't!) anyways-while they aren't identical, they certainly fit the bill for a soft, chewy, wholesome breakfast bar that is quick and simple to prepare and perfect for rushed mornings!


    Let's get it started!


    I use 'raisins' very loosely! As you can see from my first picture I used NOO's dried berry blend and craisins, until recently I've basically only used raisins so that is just what I have a tendency to call all dried fruit!


    Ingredients:
    Wet
    -1 TBSP. butter/margarine
    -2 TBSP of each:
    -honey
    -sugar (or sugar substitute)
    -maple syrup (can be sugar free)
    -applesauce
    -1/4 cup raisins~soaked in 1 cup water
    Dry
    -2 cups oats (or any dry, rolled grain-i.e. barley, rye)
    -1/4 cup flour
    -1/4 cup coconut
    -1/4 cup add-in's (i.e. flax, chia, wheat germ)
    -1 tsp. baking powder
    -pinch of salt

    Directions: 
    1. Mix wet ingredients and microwave to melt butter
    2. Heat raisins in 1 cup water for about 1 minute in microwave
    3. Let raisins sit 10 minutes in water
    4. Mix dry ingredients together
    5. Drain raisins, reserving water and chop finely
    6. Mix raisins with wet ingredients, add in raisin-water
    7. Slowly add in dry ingredients 
    8. Spread into greased pan
    9. Bake at 350* for about 35 minutes (until edges are browned)
    10. Cut into bars and allow to cool in pan for 10 minutes
    11. Remove bars from pan and cool on rack for another 10 minutes
    12. Grab and enjoy a healthy-quick snack, breakfast, treat!